E.T. MOTHERSHIP BUILD
Building the Mothership from E.T. The Extraterrestrial.
INTRODUCTION:
It was 1982 and I remember standing in line at the Cinerama Dome in Hollywood for the 3pm showing of the film. My expectations were high because it was a Steven Spielberg film. Funny, I could never have imagined then that ten years later I would be working for him.
Needless to say, I loved the film, revisiting the theater several times to re-watch it about four more times. One of my first jobs working in the entertainment industry was for the casting team of Mike Fenton and Jane Fienberg – their credits were also out this world having cast The Godfather, Raiders of the Lost Ark and of course E.T. While working for Mike Fenton I stumbled across a copy of the E.T. screenplay which was originally titled “A Boys Life” – written by Melissa Mathison who would marry Harrison Ford. I made a copy of that screenplay and still have it today. Ten years later, I recall enjoying the filming model proudly gracing the main entrance to the Amblin screening room. I would always stop to marvel at it. Below is my rendition of this iconic spaceship built from an all-resin kit created by Yaymonsters.com
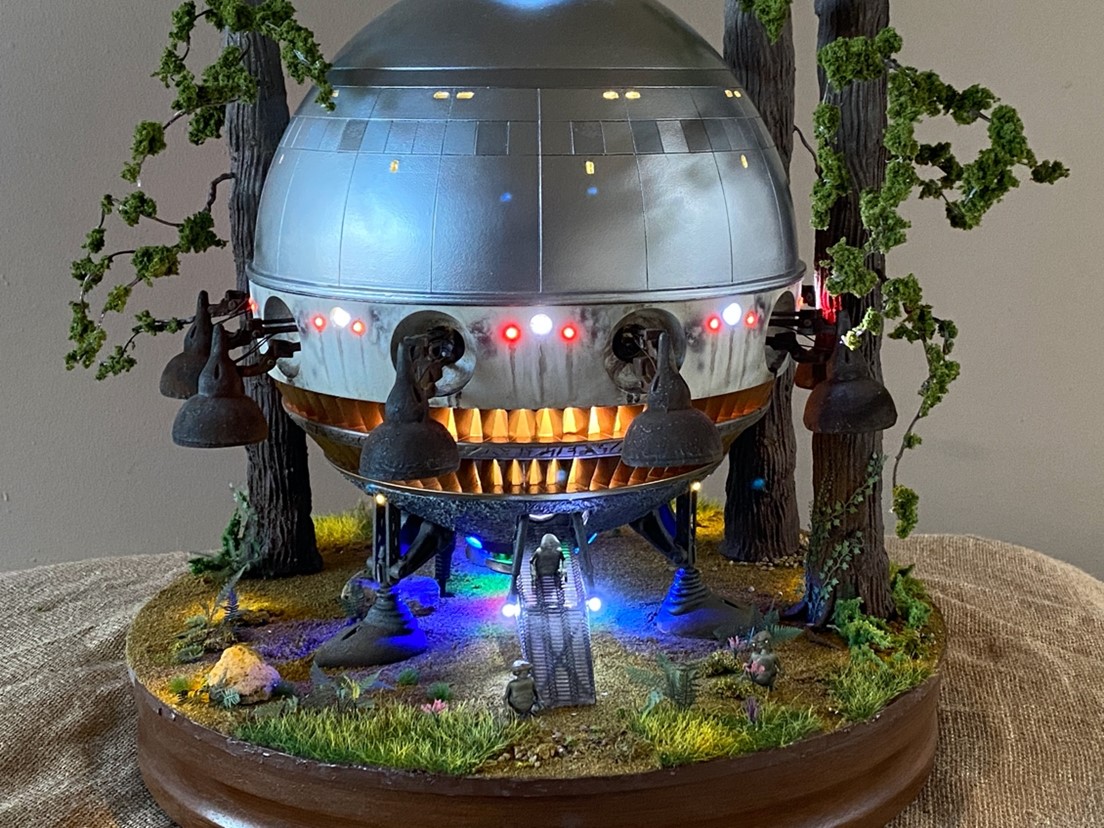
Lighting FX for the fan-blades created by Randy Nuebert – voodoofx.com
THE BEGINNING:
I thought it would be fun to give you some background on the genesis of this build as well as the amazing friendships that came from it. As most of you know who follow me on YouTube, I have several model builders I follow and often they inspire me to try something new. In the case of the E.T. Mothership, I was watching Lou Delmaso’s channel AZTEK DUMMY – his forte is smart construction planning along with amazing painting skills and often he will reveal his next build by showing what has arrived in his mail that episode. I happened to be watching a build series by Lou when he stopped to show us a box that had just arrived. Like a giddy school boy, he opened the box and pulled out a resin kit of the E.T. Mothership. This is where I stop to say that I’m working very hard to improve my knowledge of what’s out there for us all to build – I will be creating a list of talented artists who sell their own garage kits but I will only publish their information if I’ve built the kit and can stand behind it as worthy of your hard-earned bucks.
Lou’s mothership came from a company called goldenarmor.com – I went to their website and ordered the kit – $350 – when the kit arrived, I immediately opened the box to inspect the kit – I find it’s always a good idea to do this. Don’t wait months to open the box just because you are not planning to start your build for a while. By opening the kit right away and taking a good look at the parts you can see right away if anything is broken or missing and reach out to the artist to rectify the issue. I’ve found that most artists are always happy to assist and make things right as long as you handle the problem right away. The goldenarmor kit is well cast with a lot of the parts having little or no flash to deal with – having said that, as of this writing, the goldenarmor team are on version four of the kit with a lot of the mistakes ironed out. I dare say that Lou’s build helped goldenarmor work out a lot of the kinks. Once I had determined the kit was complete, I placed it on the stash shelf. Several weeks went by when I found myself watching Randy Cooper’s YouTube channel and he was promoting of all things, the E.T. Mothership kit, not from goldenarmor, this kit was from another artist who goes by the company name of yaymonsters.com – needless to say, I was intrigued. I immediately went to the yaymonsters website and purchased the kit – as some of you know, I consider sprueVerse to be a test kitchen of sorts so picking up another version of the same subject to inspect was not out of the ordinary for me. I should mention here that when I ordered the yaymonsters version the website offers a very extensive line of projects and kits with several sets of photos for you to check out as well as a history of the creation of the E.T. kit and others. When you check out to pay, you are offered two versions of the kit – version one, is pretty rough and needs the perfunctory clean-up of all the parts and some vigorous sanding – version two, $40 bucks more comes all cleaned up for you with minimal flash or clean up required. This is the version I ordered – you are supposed to be able to just assemble and paint. While the kit does arrive extremely well packed and cleaned up, it’s by no means ready to assemble and paint – don’t take this the wrong way, Chuck does an awful lot of the heavy work for you but on my kit, some holes were not drilled out, flash was quite heavy on the fan blades, and the antenna array was not as crisp as I’d hoped for.
*I have a detailed close-up unboxing of both kits on my youTube channel.
THE BUILD:
I started with the headlamp/engine lamps from the center ring of the ship – I refer to these as lamp/engines because in the film these lamps open and illuminate the landing site when the ship arrives on Earth, but when the ship takes off the lamps appear to become engines!
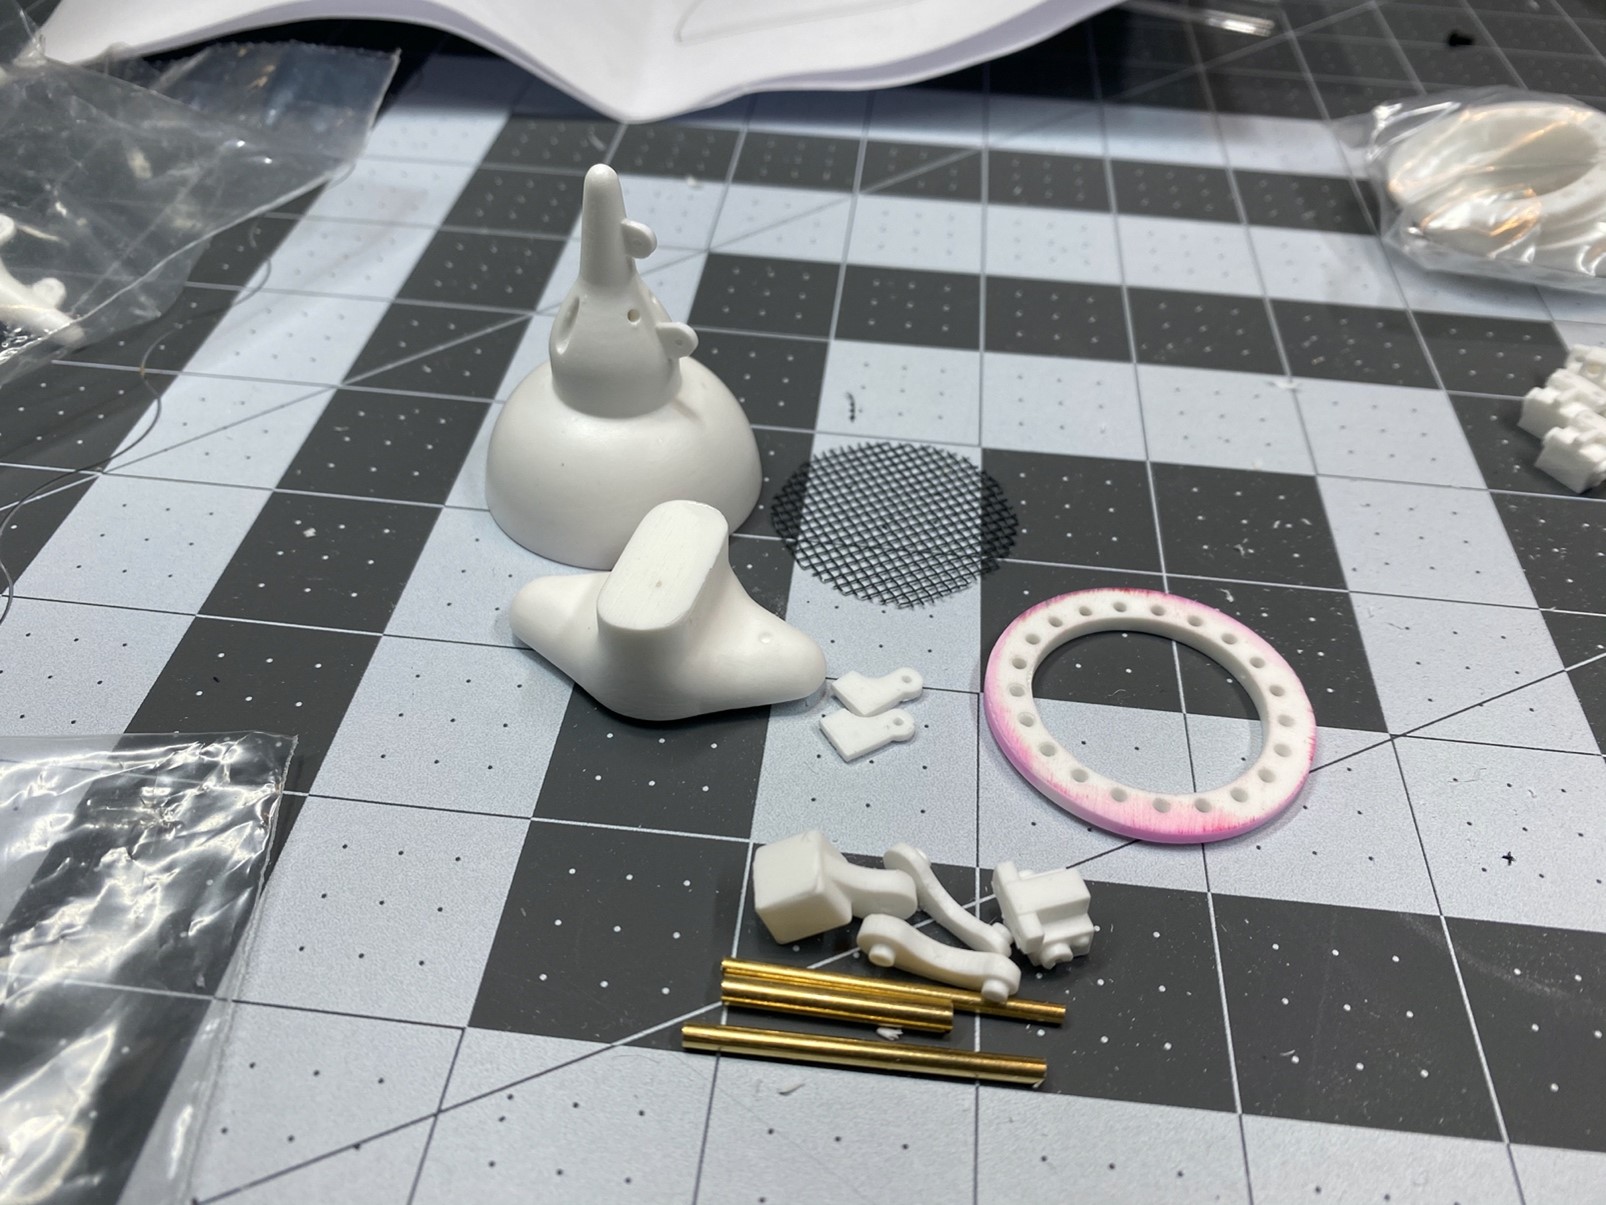
There were nine of these babies to assemble and wire for light. Notice the screen material I cut for the lens of the lamp – I made these from a screen door patch kit – I simply traced around the screen patch with the outer lamp housing than cut the shape out with a pair of sharp scissors. *Note that these screens are provided in the goldenarmor version.
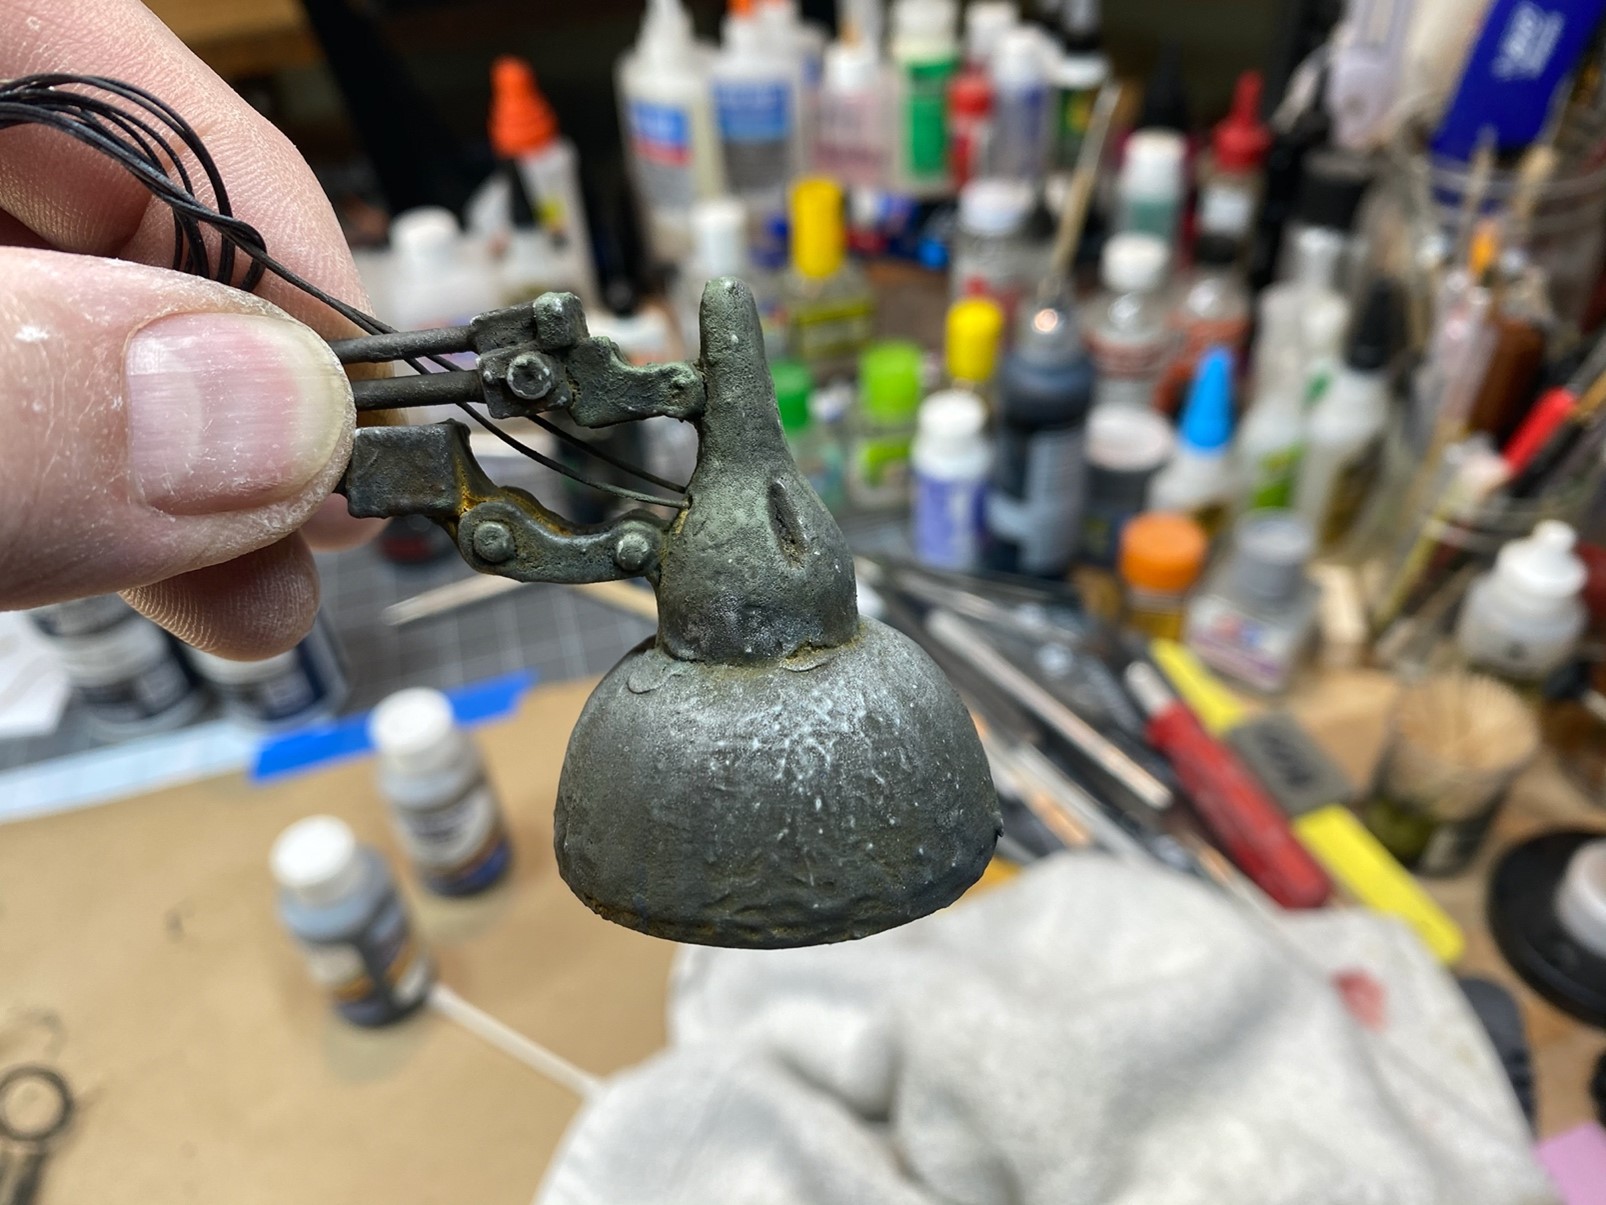
After assembly of the nine lamps’, I primed them and painted them with a base coat of Krylon Iron. After that dried, I coated the entire lamp with Tester’s modeling paste – once that had dried, I coated the entire lamp with a metal rusting agent that caused the surface of the lamp to rust over. Once that was dry, I used several washes, mostly browns to add some surface detail – when all of that was dry, I finished up using Tamiya shading pastels to add some steel and green shades to the crevices. Below is a completed lamp wired with a 3mm LED in warm white ready to install.
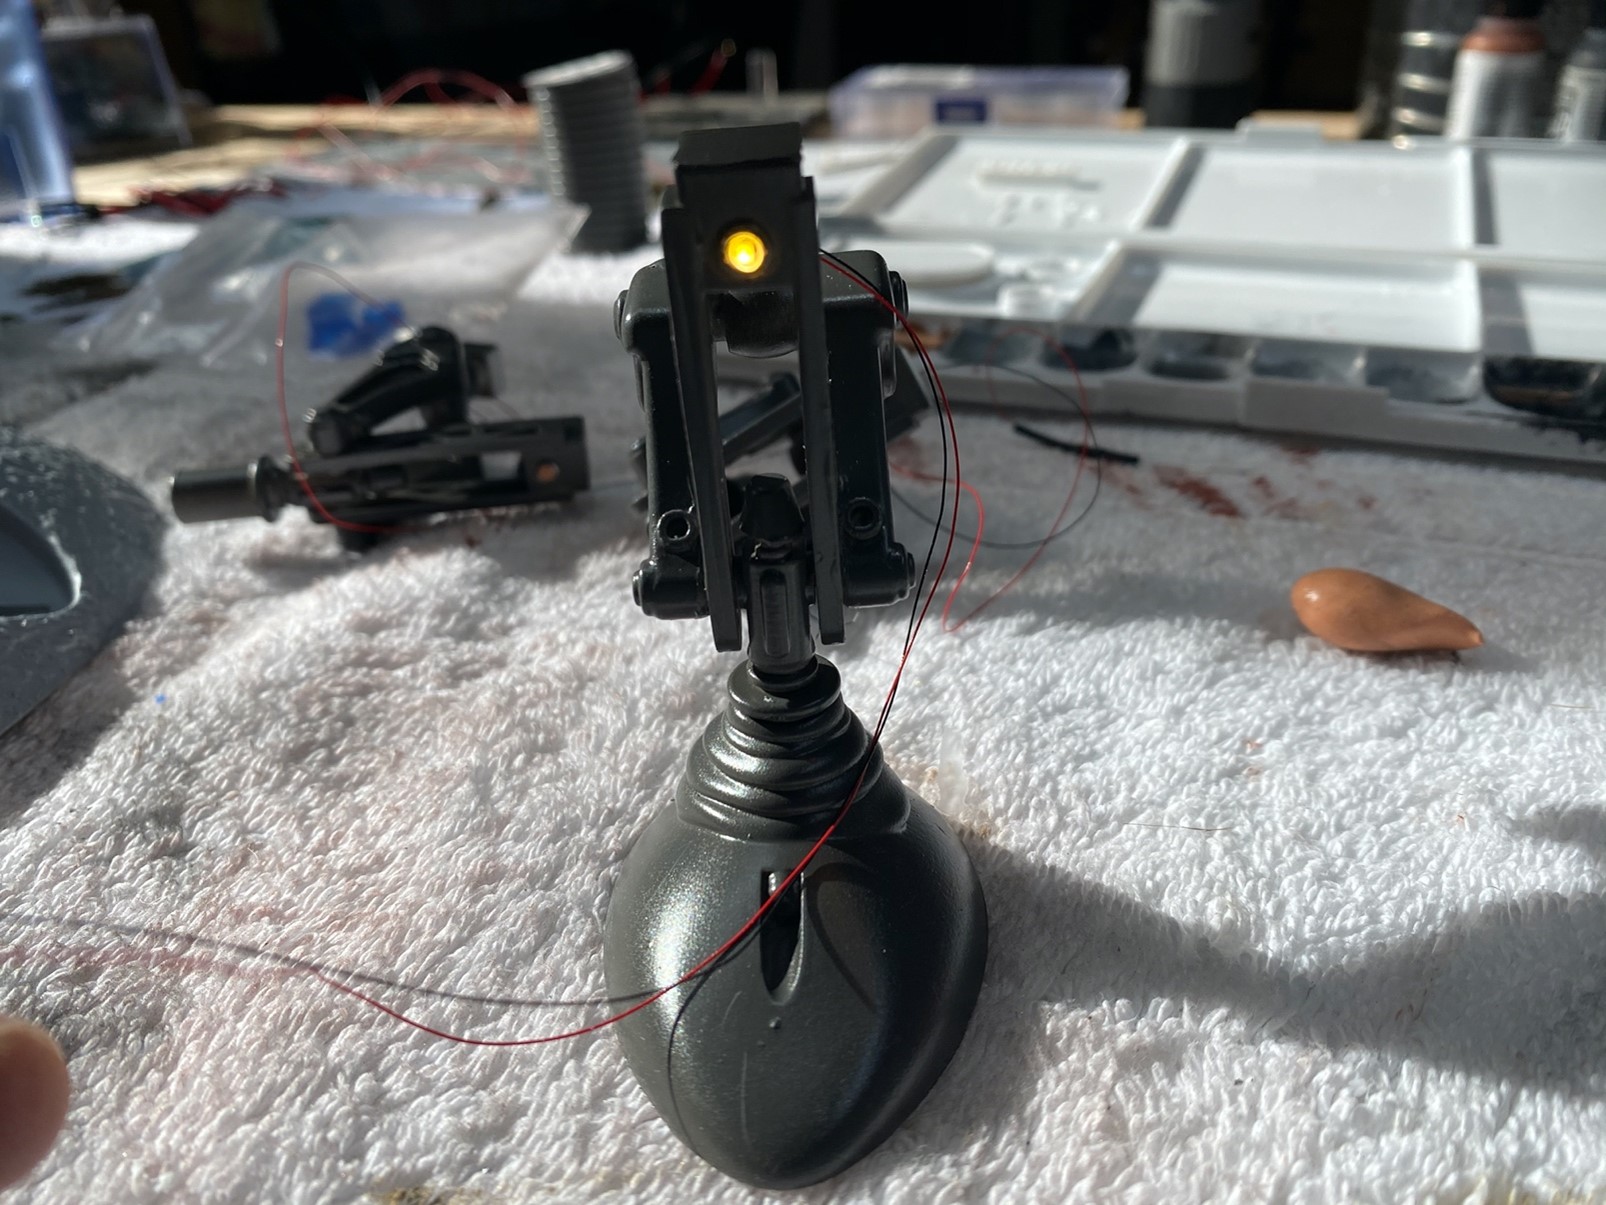
Next, I moved onto the feet and landing gears – there were three of these, which I wanted to finish the same way as the lamps as I felt they would be fabricated from the same materials somewhere at the space dock on planet who knows! The feet went together with only a few minor fit issues which did not take long to figure out. All three feet were wired with small warm white nano chip lights. The lens covers for the lights are simply dabs of micro crystal clear. At this stage, I had not added any washes or finishing details. This photo simply shows the finished paint work with the landing gear light installed.
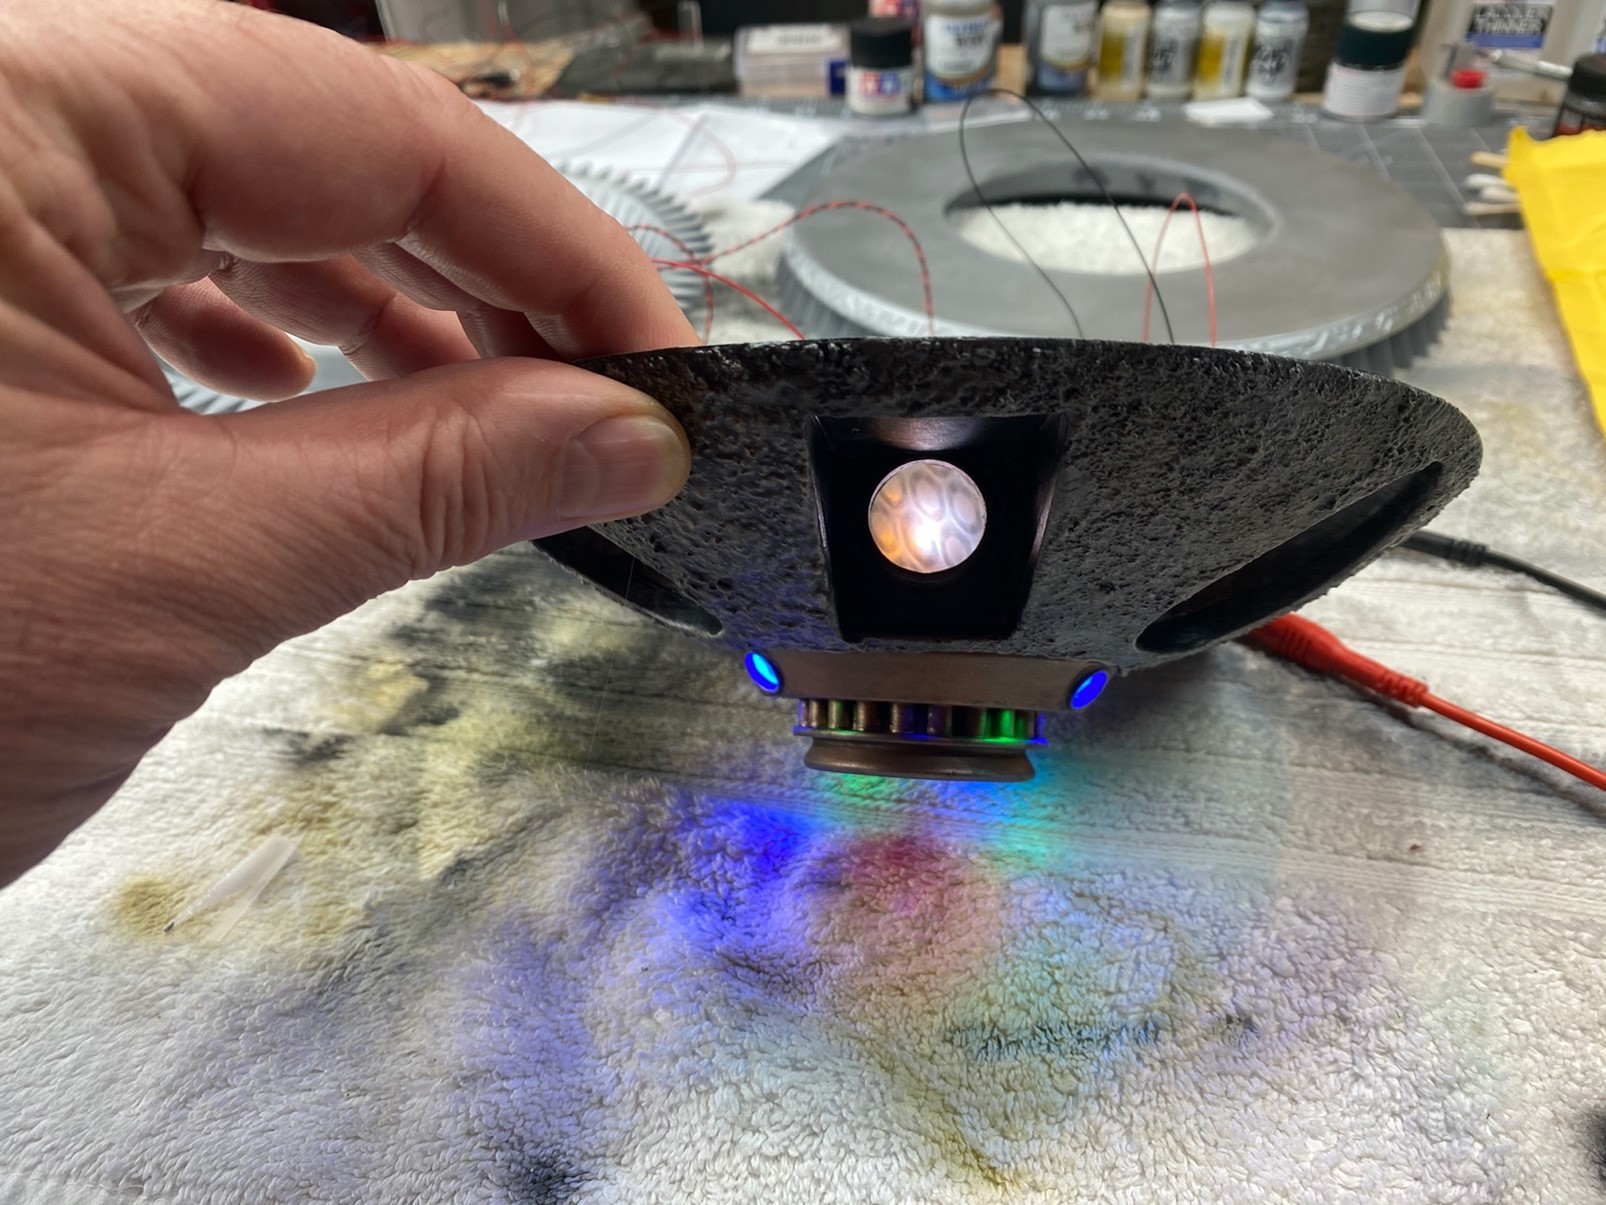
After completing all three legs, I moved onto the engine housing and lower base module that the landing gears and feet attached to. The engine module came with blue acrylic lenses and pre-drilled holes for nine smaller lights and a center lens made of pink acrylic for the main engine housing. I chose “breathing LED’s” of alternating colors, blue and green for the circle of lights that surrounded the larger blue lights, while the center pink lens had three 5mm warm white bulbs for its source.
The below photo also shows the very alien like diffusion material I used to cover the entrance door which is backlit with two light sources; one 3mm cool white LED and a second 3mm LED which was amber – I placed the amber light closer and off to the side while the cool white lamp was set back to shine light on the entire diffusion screen.
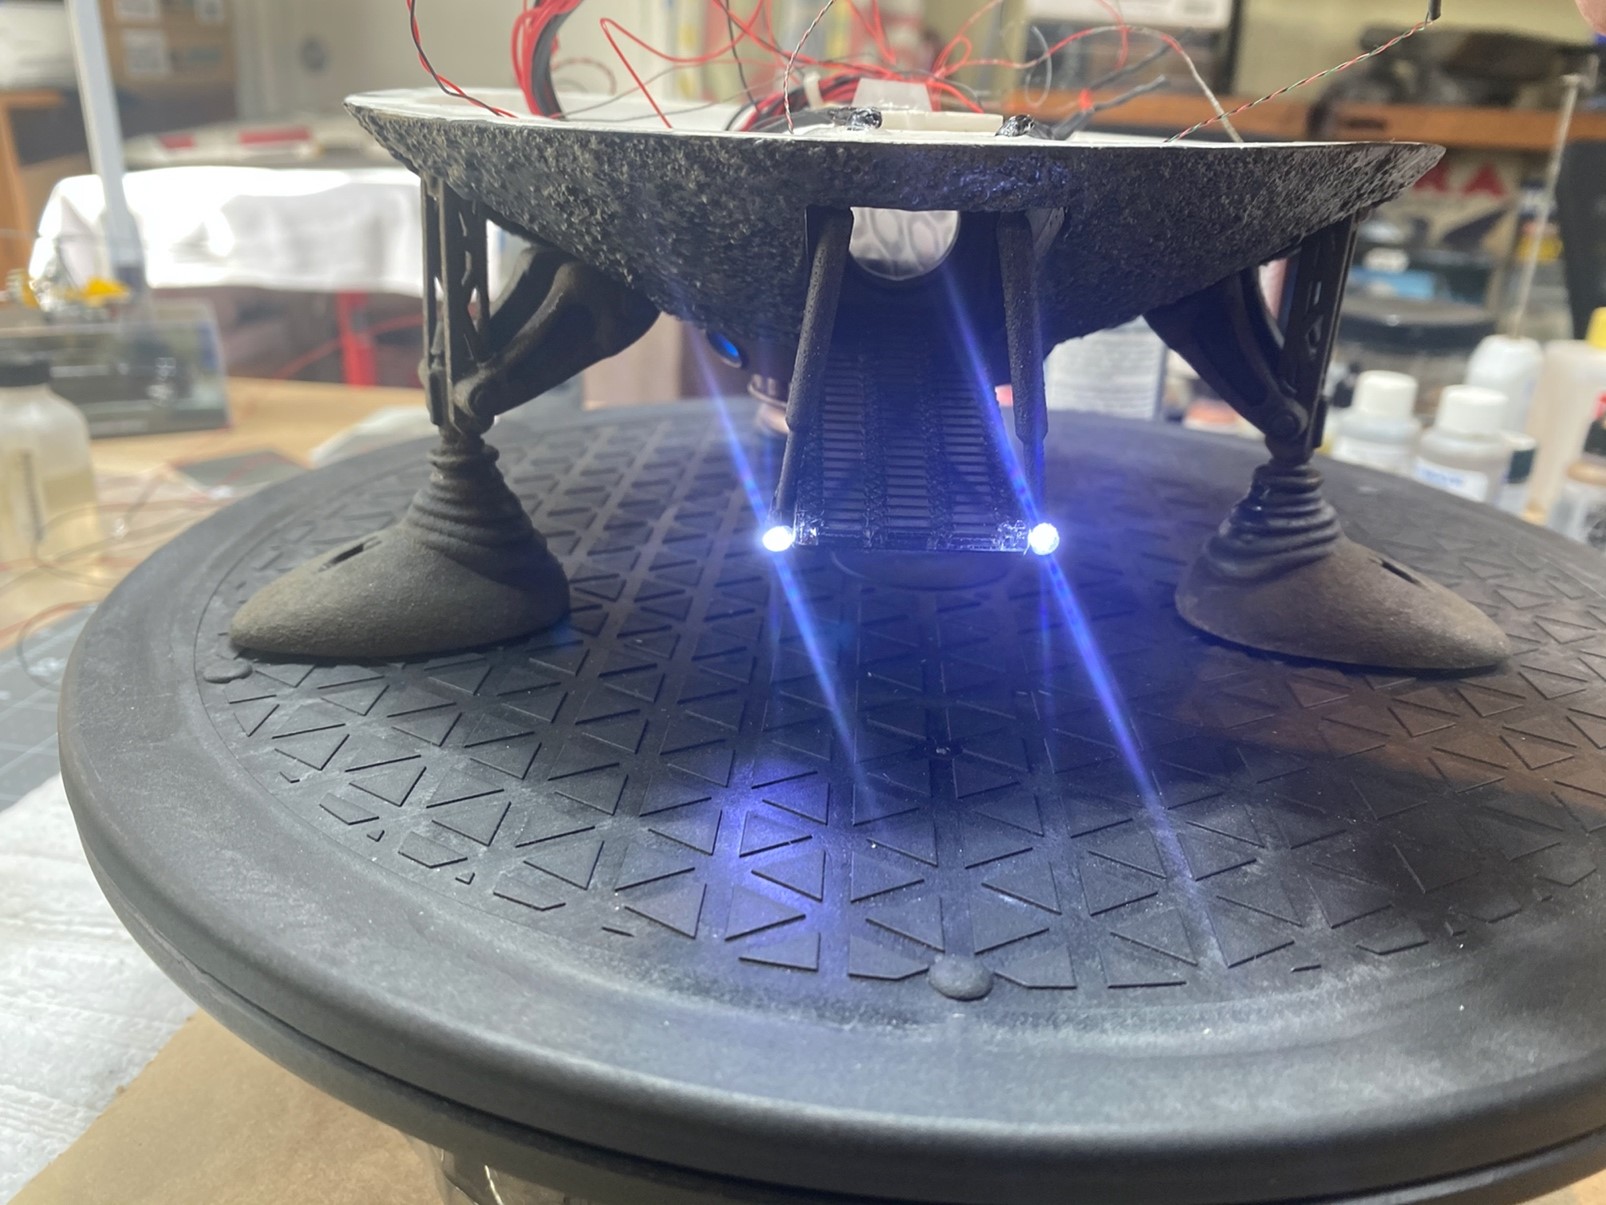
The paint scheme for the lower base was a mixture of grey, brown and several shades of white tinted with a touch of brown to age its color. Once the landing gears where installed, I added light to the hydraulic pistons that raised and lowered the landing ramp. This was accomplished by drilling into the resin parts with a .05 drill bit and running two cool white nano chips through the posts which are wrapped around the back of the post and fed into the main body of the ship – at this point all the lighting has been installed into the lower portion allowing me to slowly move up the body of the kit.
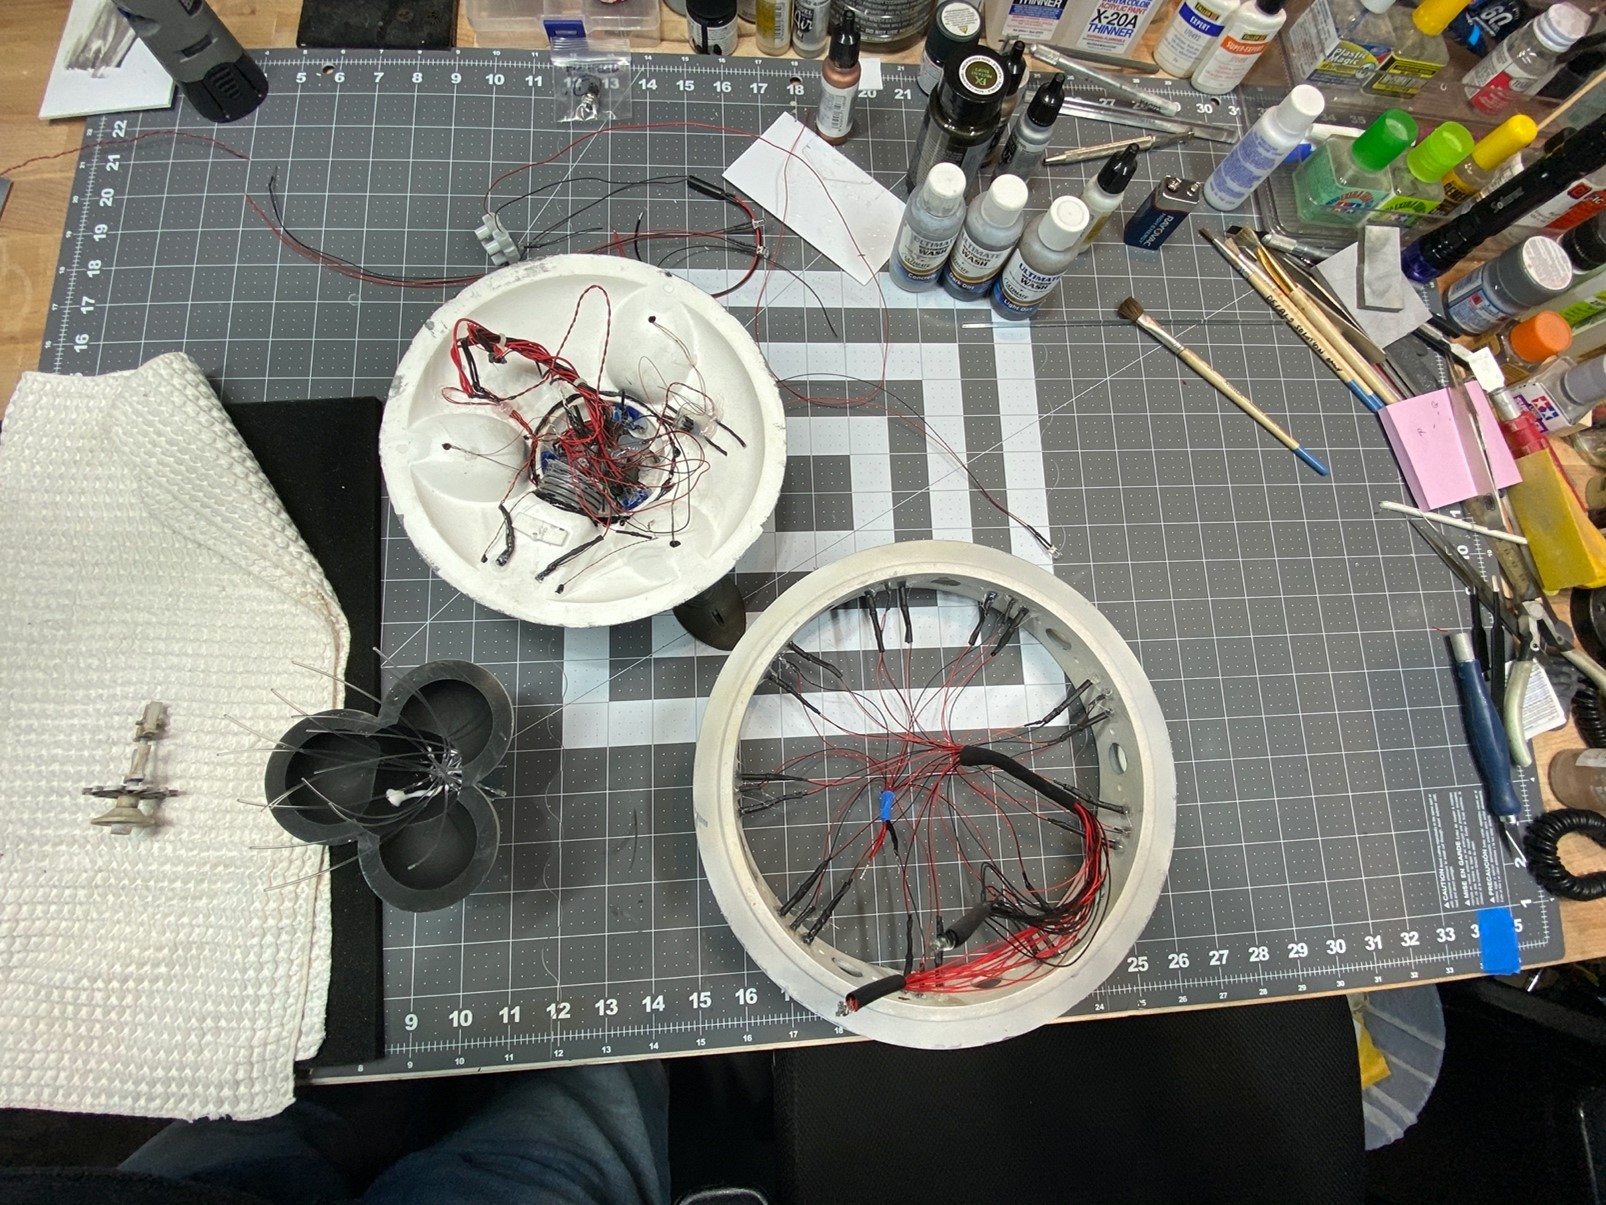
Next, I moved on to the main body ring which housed the lamp/engines and several other lights – nine white lights surrounded by eighteen smaller red lights. The white floods were made from 3mm cool white LED’s while the red lights were created by inserting 3 inch pieces of 3mm fiber optic rod attached to 3mm red LED’s all tied to the same single circuit – more on the wiring later, but this model needed some very special attention to the power sources and how they would be implemented to make this model light up safely without fear of overloads or outages from voltage fluctuation.
After all the flood lights were installed, I attached the nine lamp/engines to the same body.
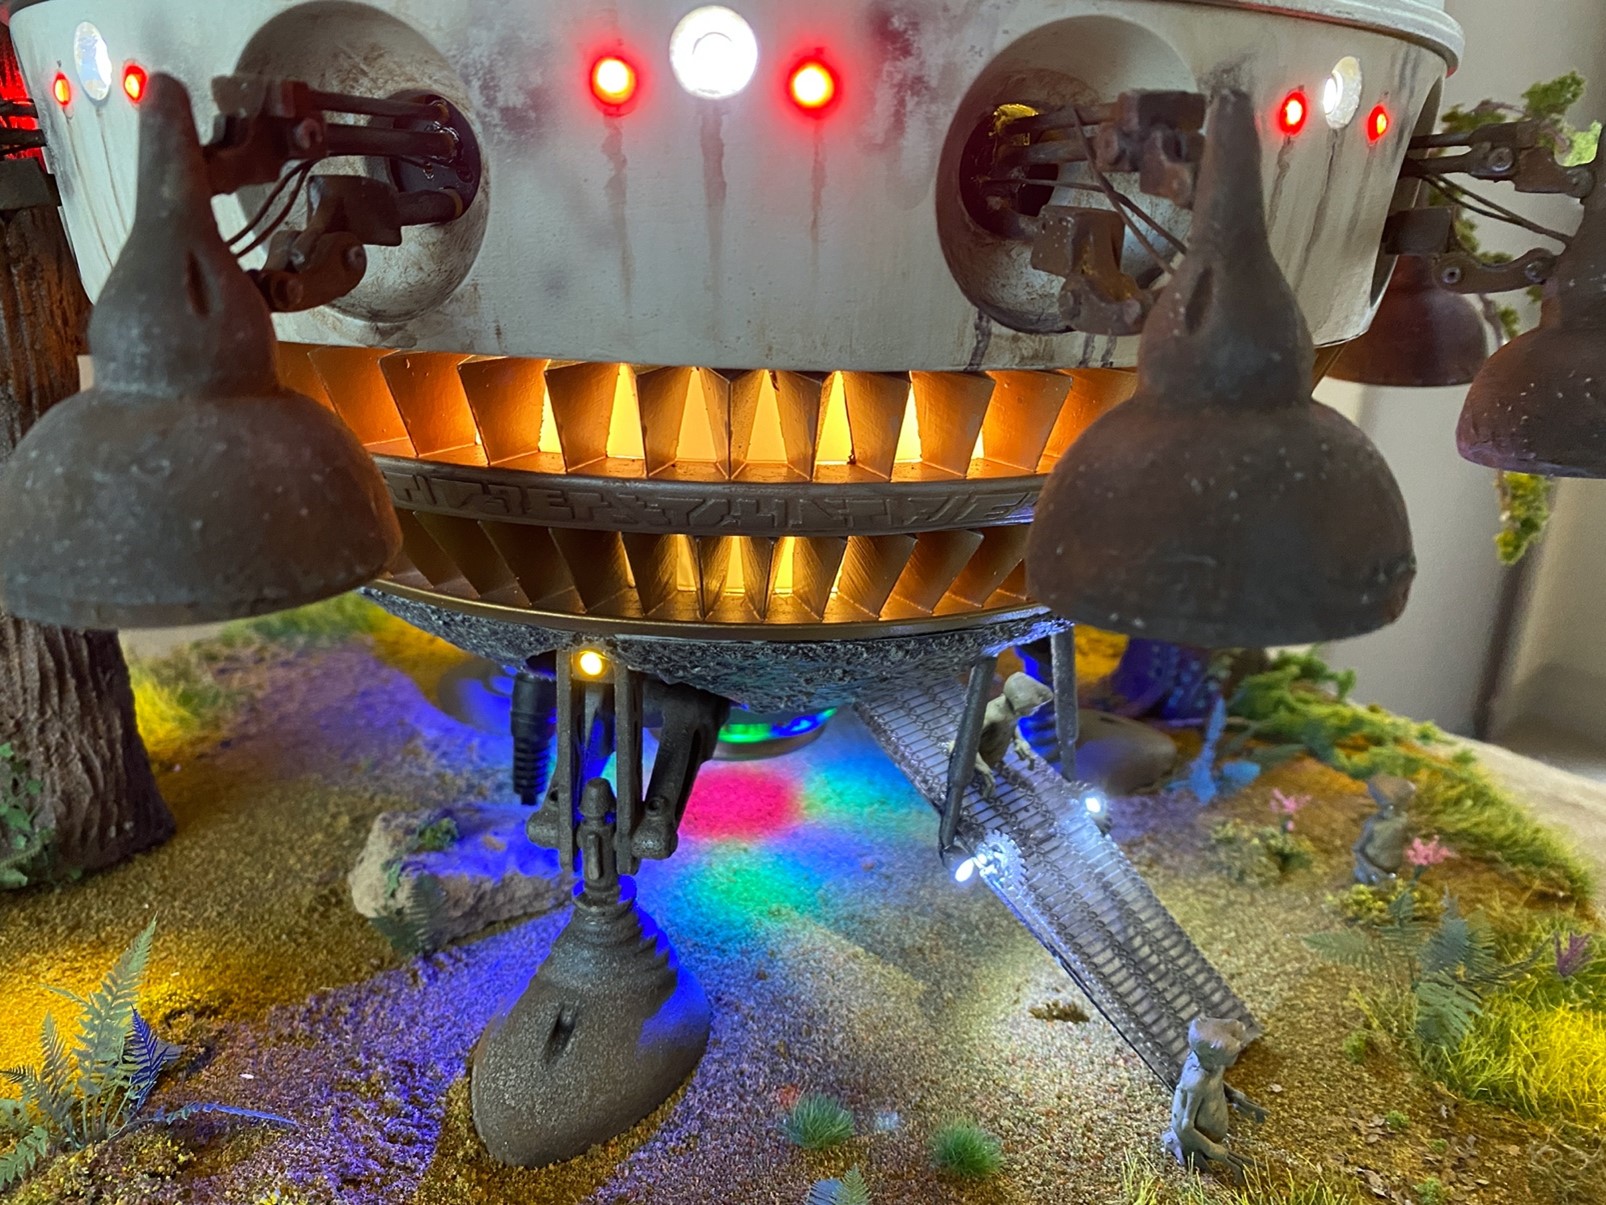
The fan blades were painted with several coats of gold and rusty yellow with several washes of browns and blacks over the finish to age them down. You will notice in the below photo that the fan blade rings also contained a hieroglyphic band known as the “language band” – this was painted in several coats of gold, then dry brushed with varying shades of steel and aluminum from Vallejo paints.
The lighting effect for the fan blades is an ingenious creation of Randy Nuebert at VoodooFX – it consists of two bands of RGB LED strips with each individual light on the strip being independent of the rest so they could be programmed to flash separately at different rates of speed. All connected to a programmed board with a built-in pot or potentiometer which allows for the speed of the effect to be regulated. This system was run of 5 volts while the rest of the lighting design runs on 9 volts which required the use of a “stepdown” board that allows the use of 9 volts and 5 volts all on the same system. I go into much detail on this and how it was installed on my YouTube channel, sprueVerse.
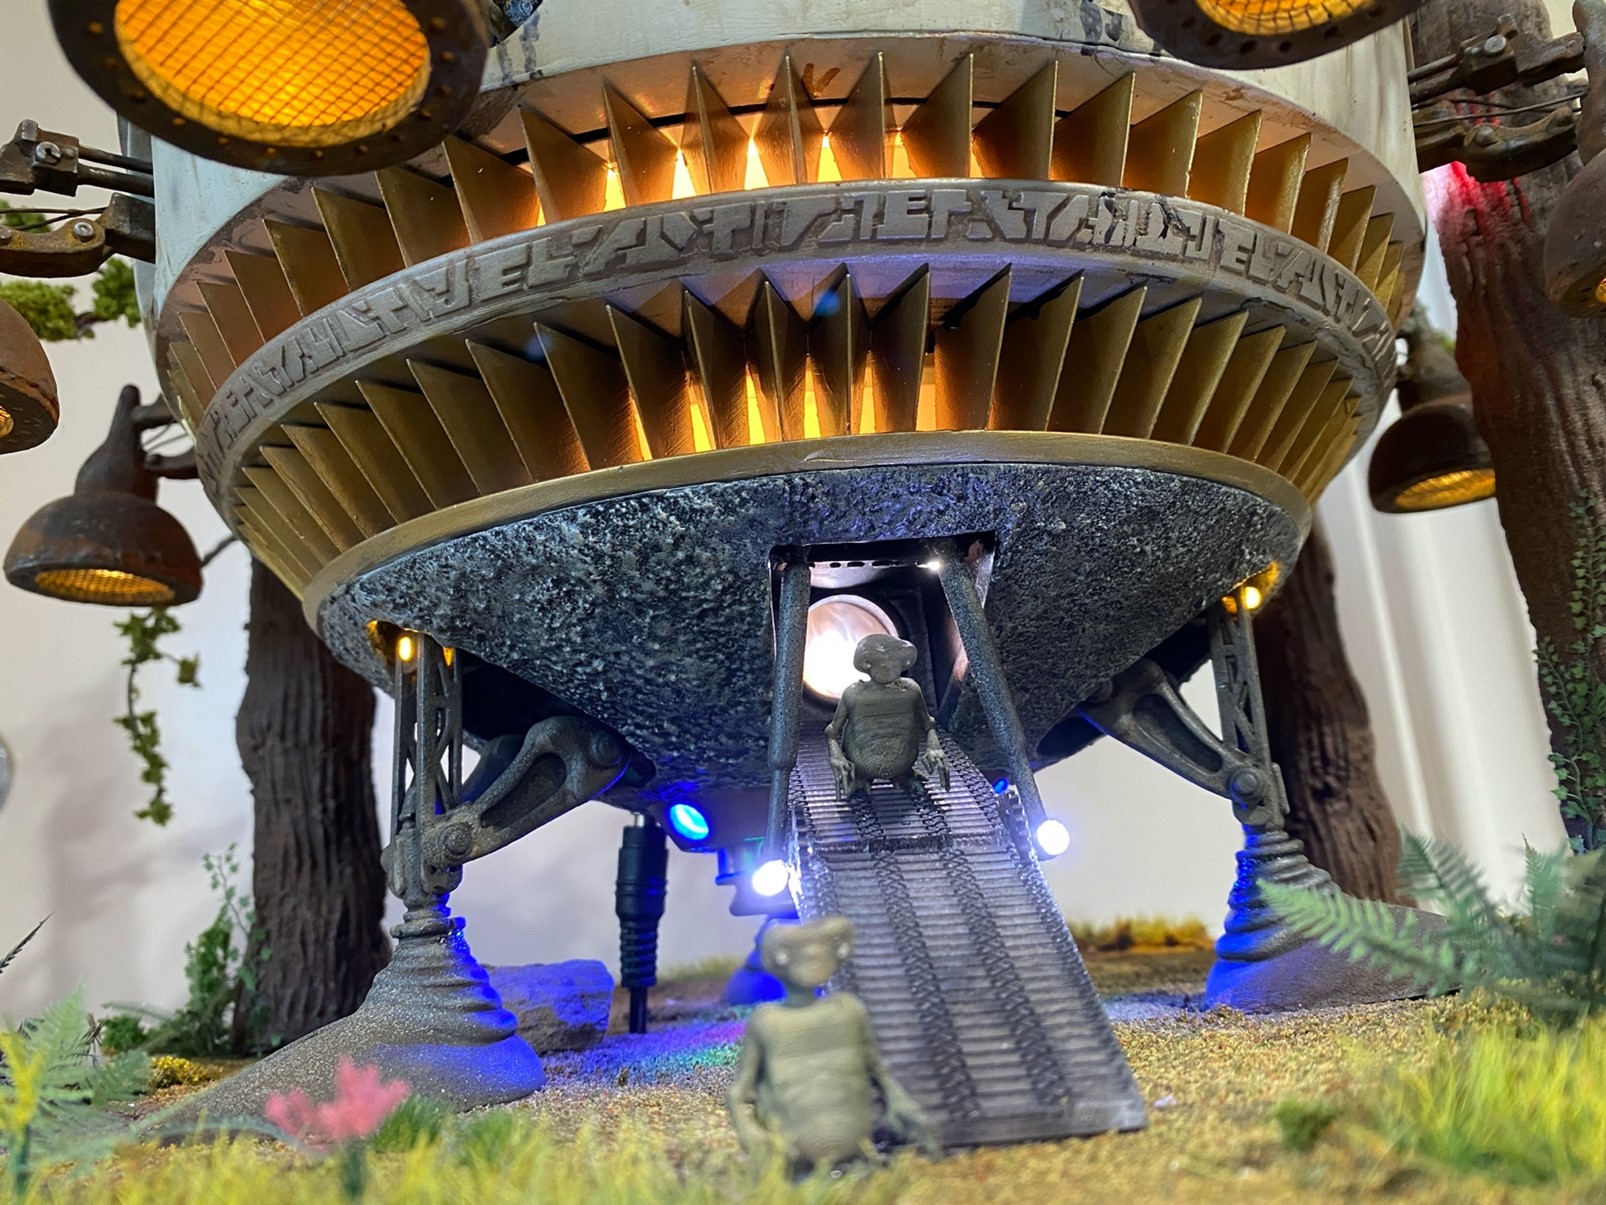
The main body ring housing the lamp/engines and the red and white floods was painted in Tamiya’s Insignia White then aged and detailed with various washes from Ultimate Models – I like the Ultimate washes because they are clay based and very easy to work with when you are using acrylic paints. Note the stains of water coming from the bottom of the flood light housings – this detail is on the filming model and I’m guessing represents water that had gathered in the bell of the openings and simple dripped down. You can also see strange blotches of black that cover the ring in various places – I have no clue what these are supposed to represent? Battle damage perhaps? Meteor hits? Who knows?
Once the upper main ring was complete, I turned my attention to the dome which needed to be chromed – I go into great detail on how this was accomplished on the build series on my channel. I will also list all the materials used on this build at the end of the journal.
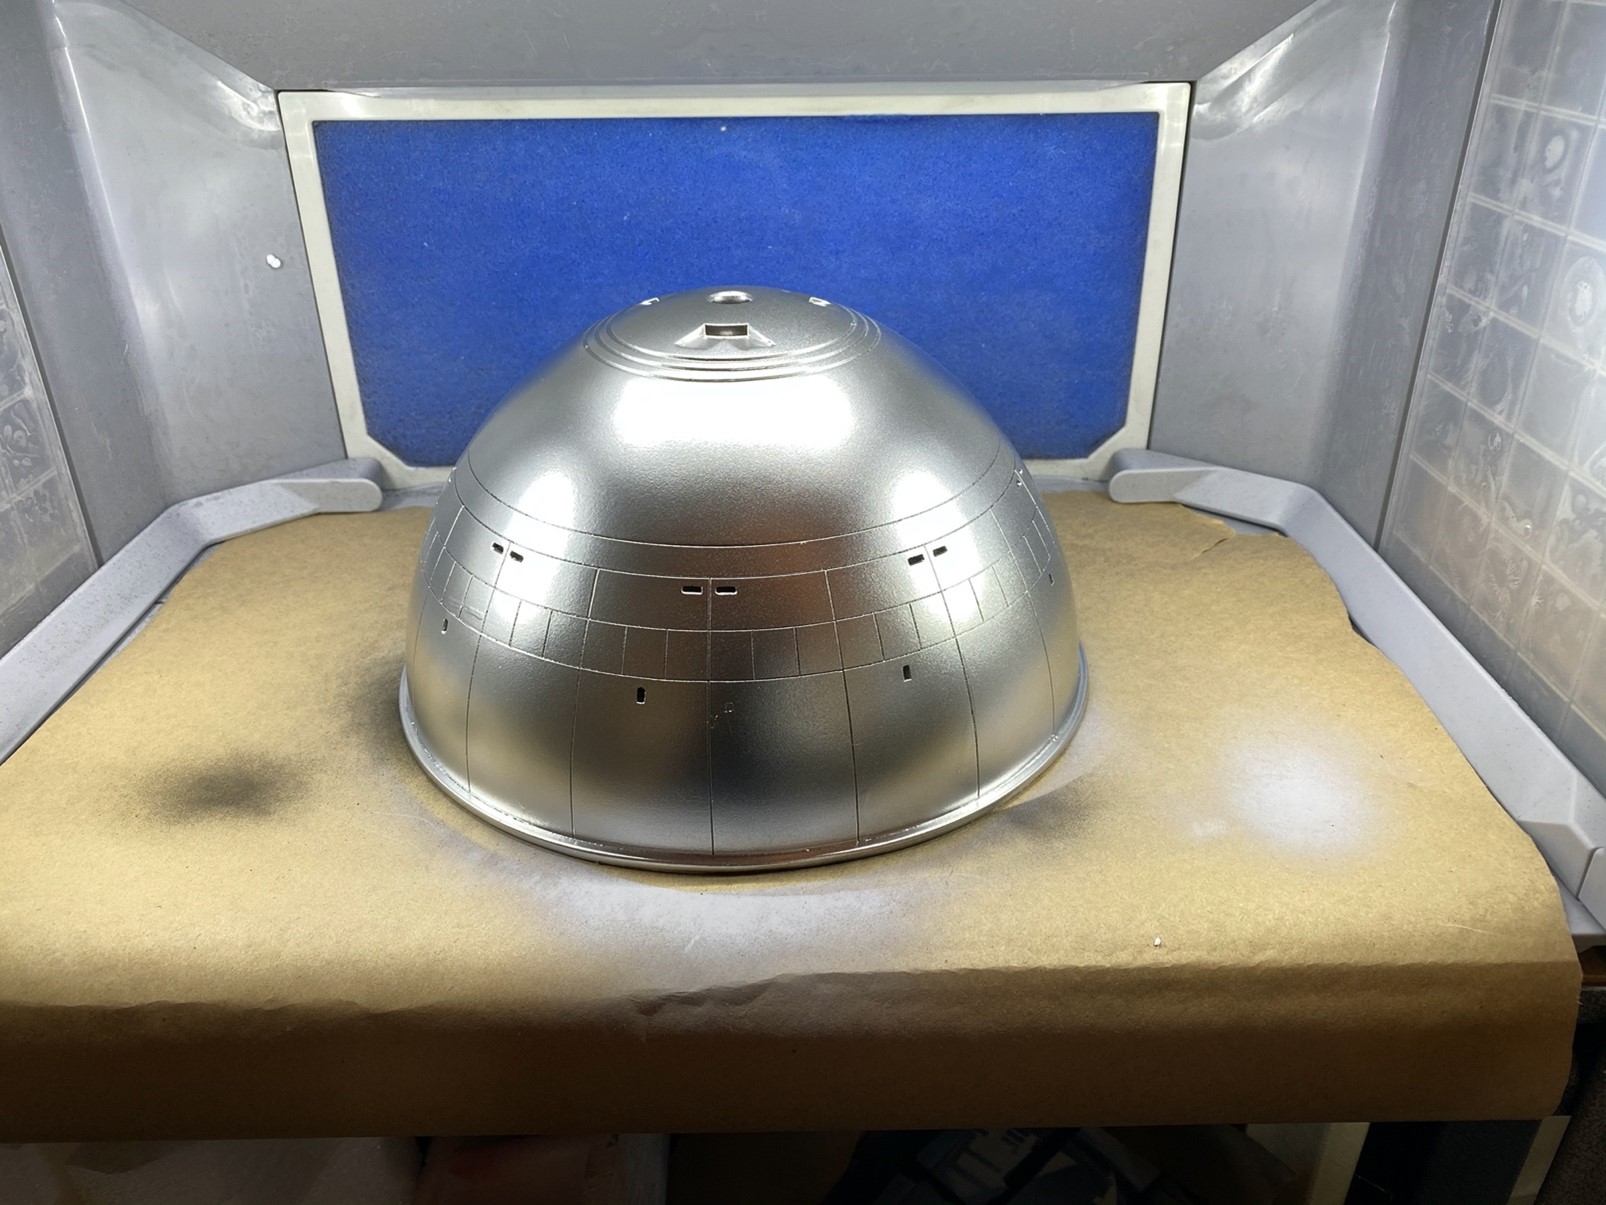
The dome drying at my paint station. A very nerve racking but satisfying event I go into in great detail as to why on the build series videos.
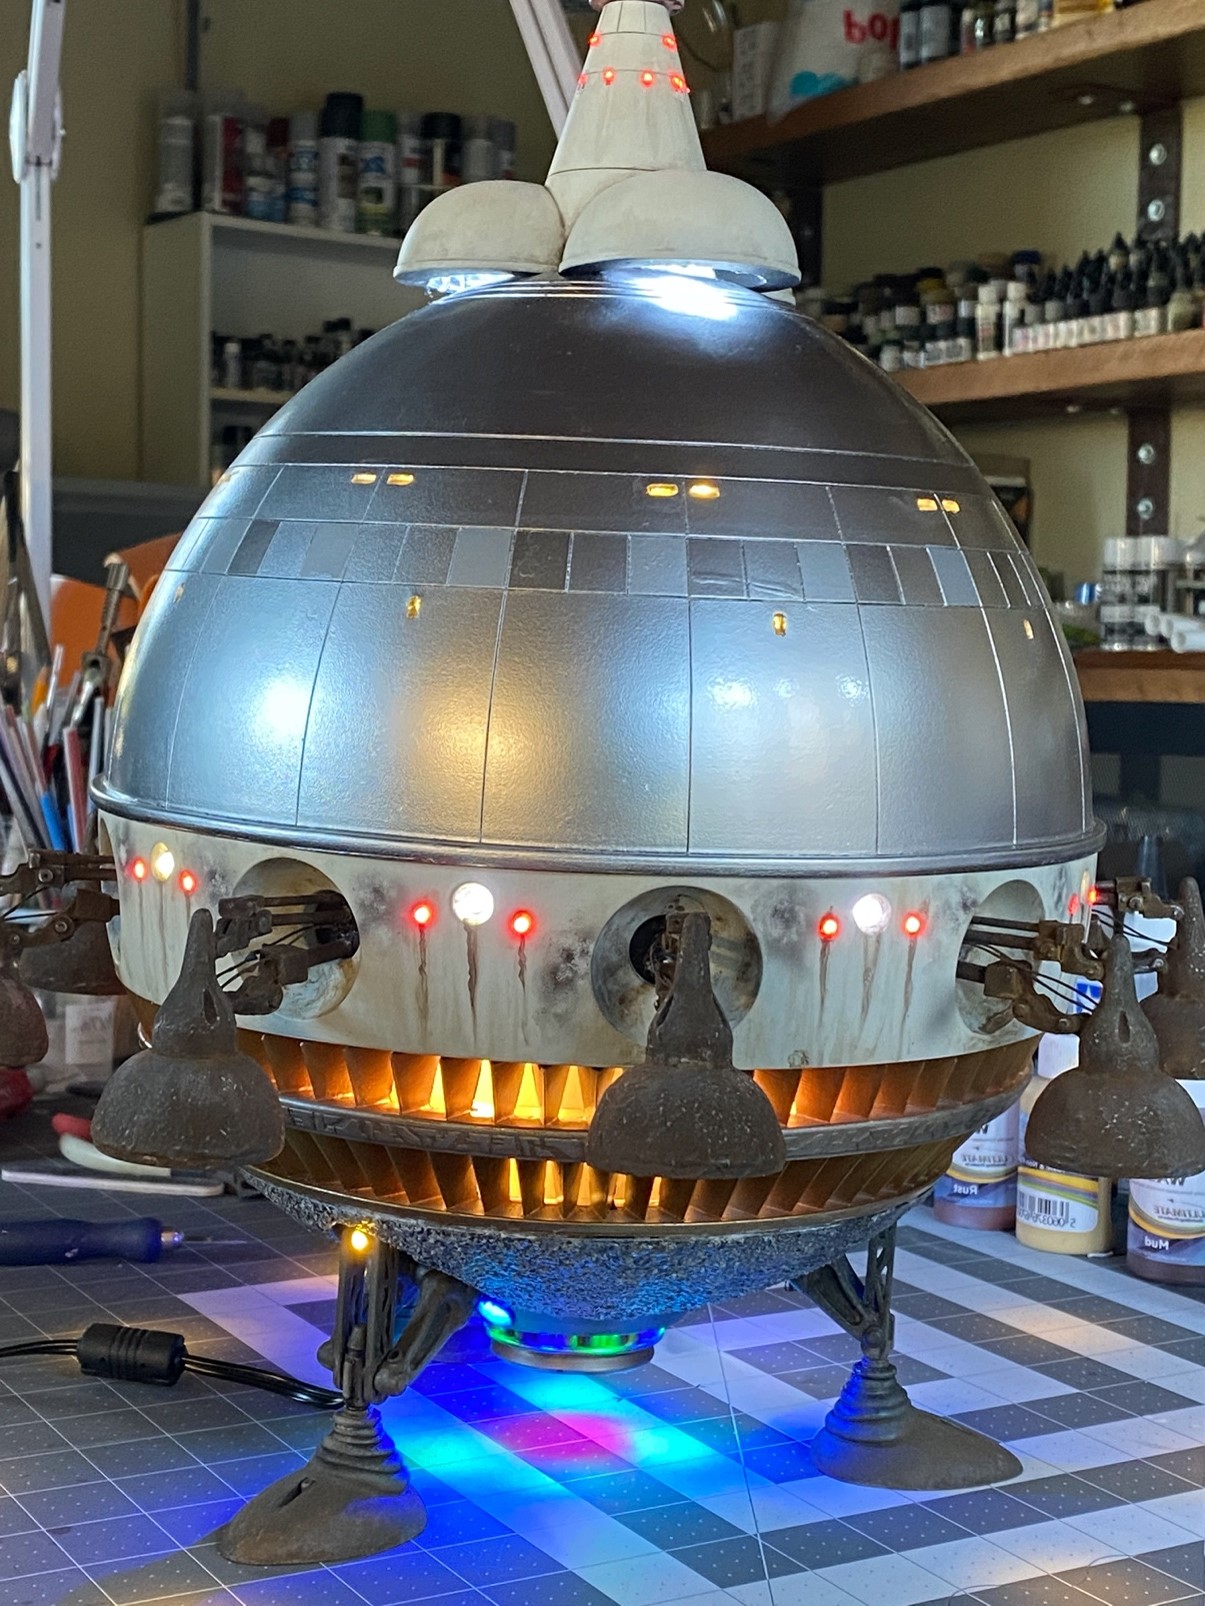
Once the dome had been chromed, I did add various shades of silver, steel and aluminum from Vallejo paints to the small band of panels just above the first set of larger panels you see in this picture. Once that was accomplished, I added Micro Krystal Klear to all the windows.
Once this was completed, I set about lighting and finishing the upper antennae array and housing – this was accomplished with 1mm fiber optic strands lit with 3mm red LED’s for the windows and three 5mm cool white LED’s that allow light to flood over the top of dome.
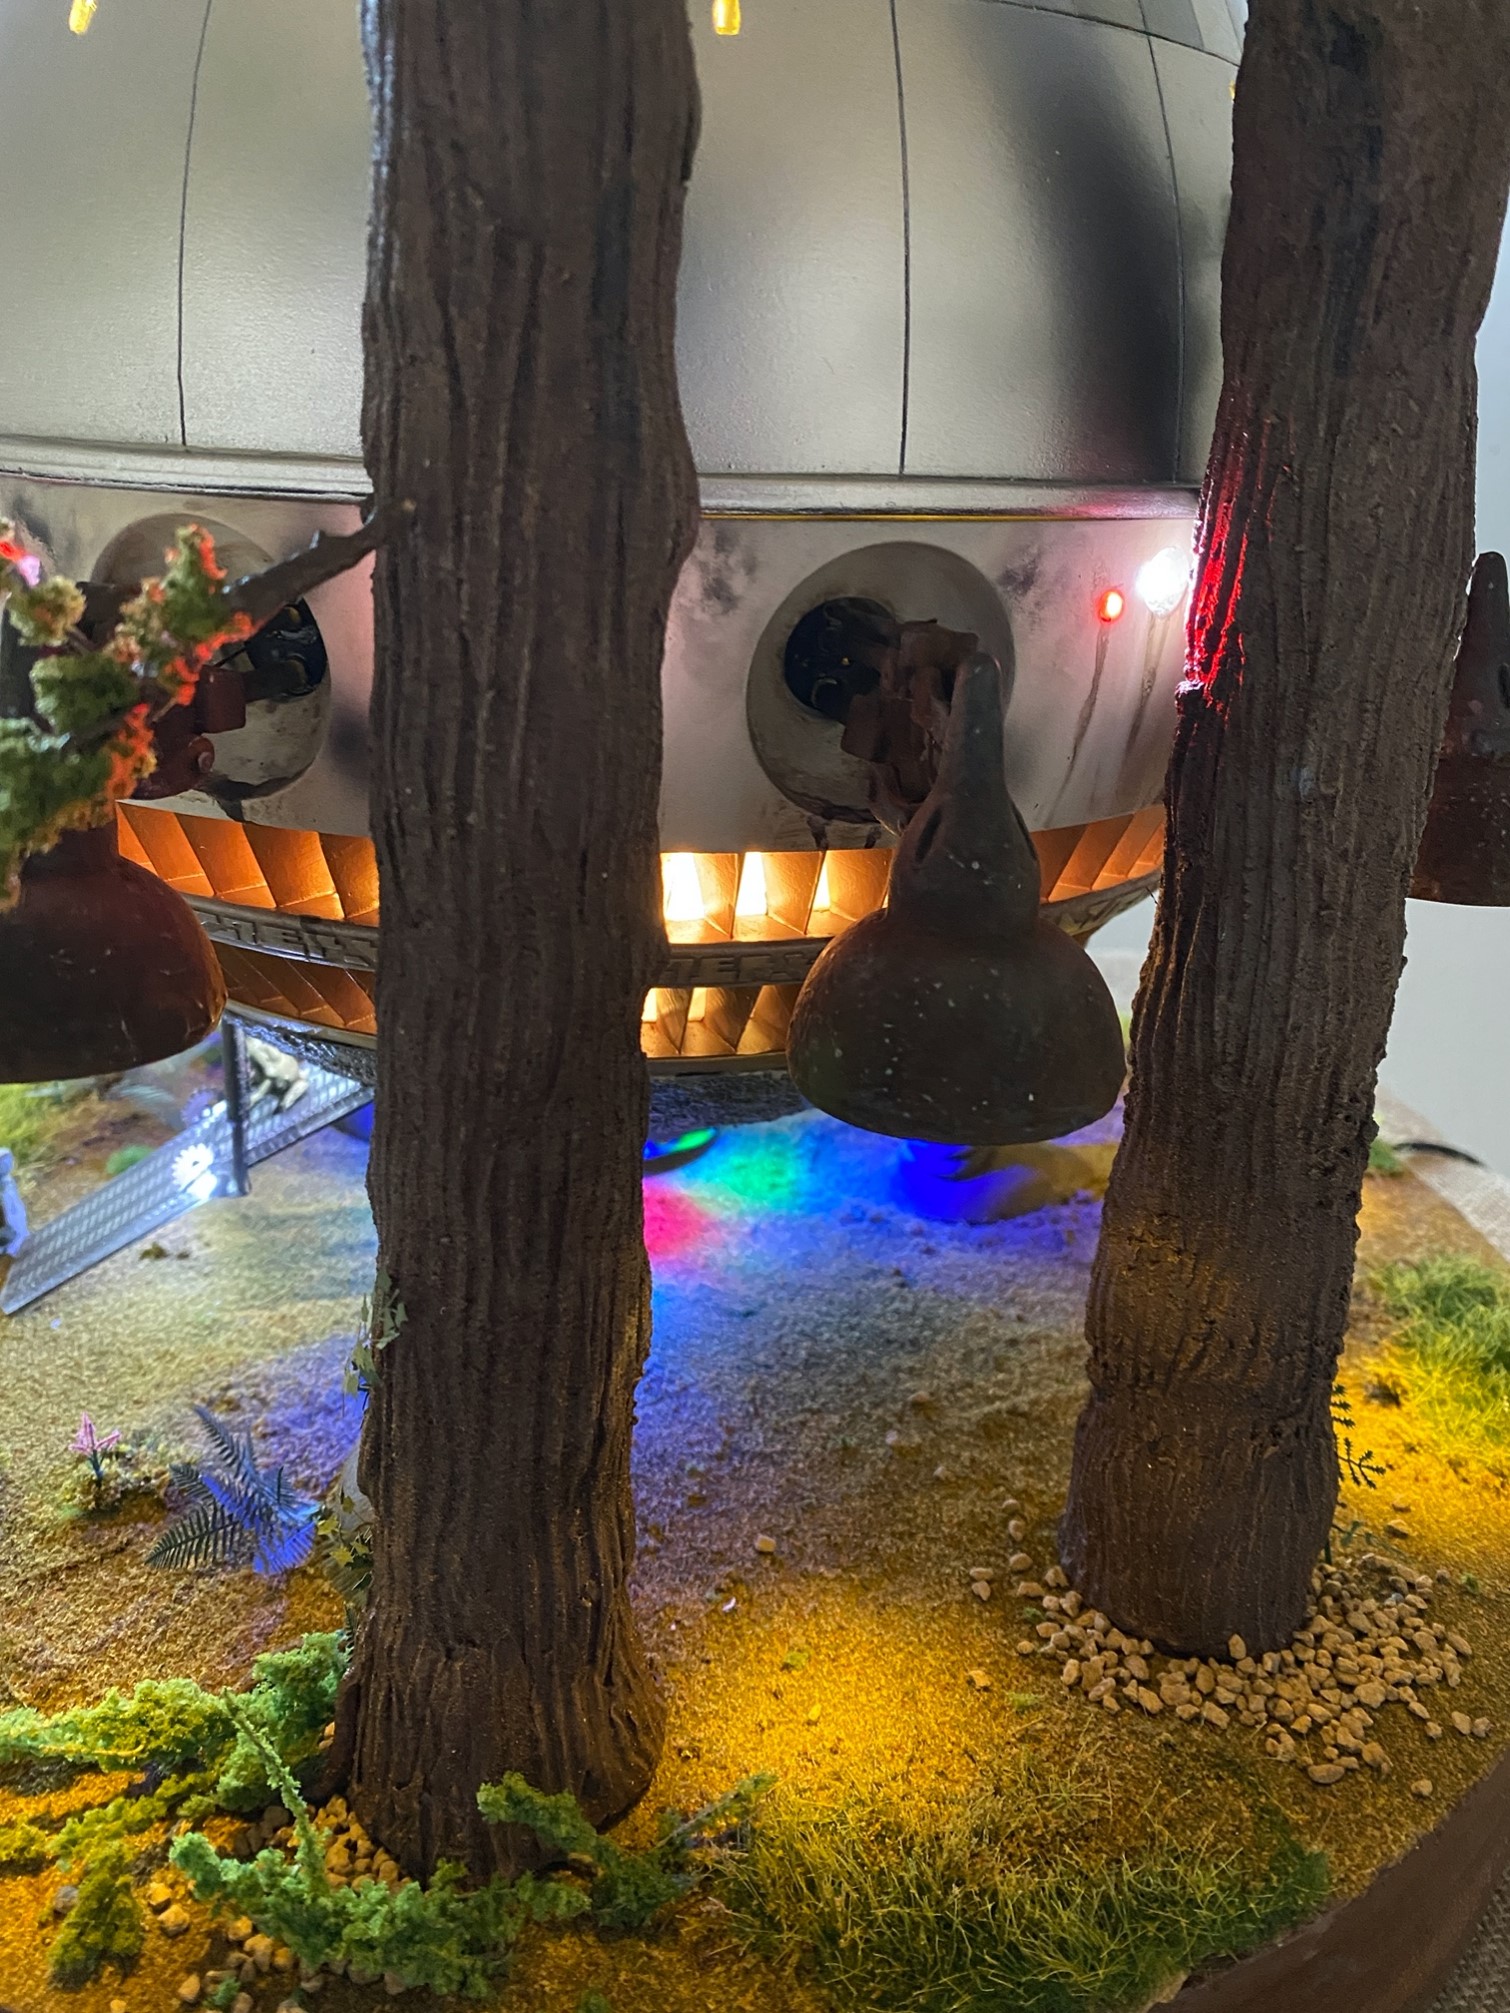
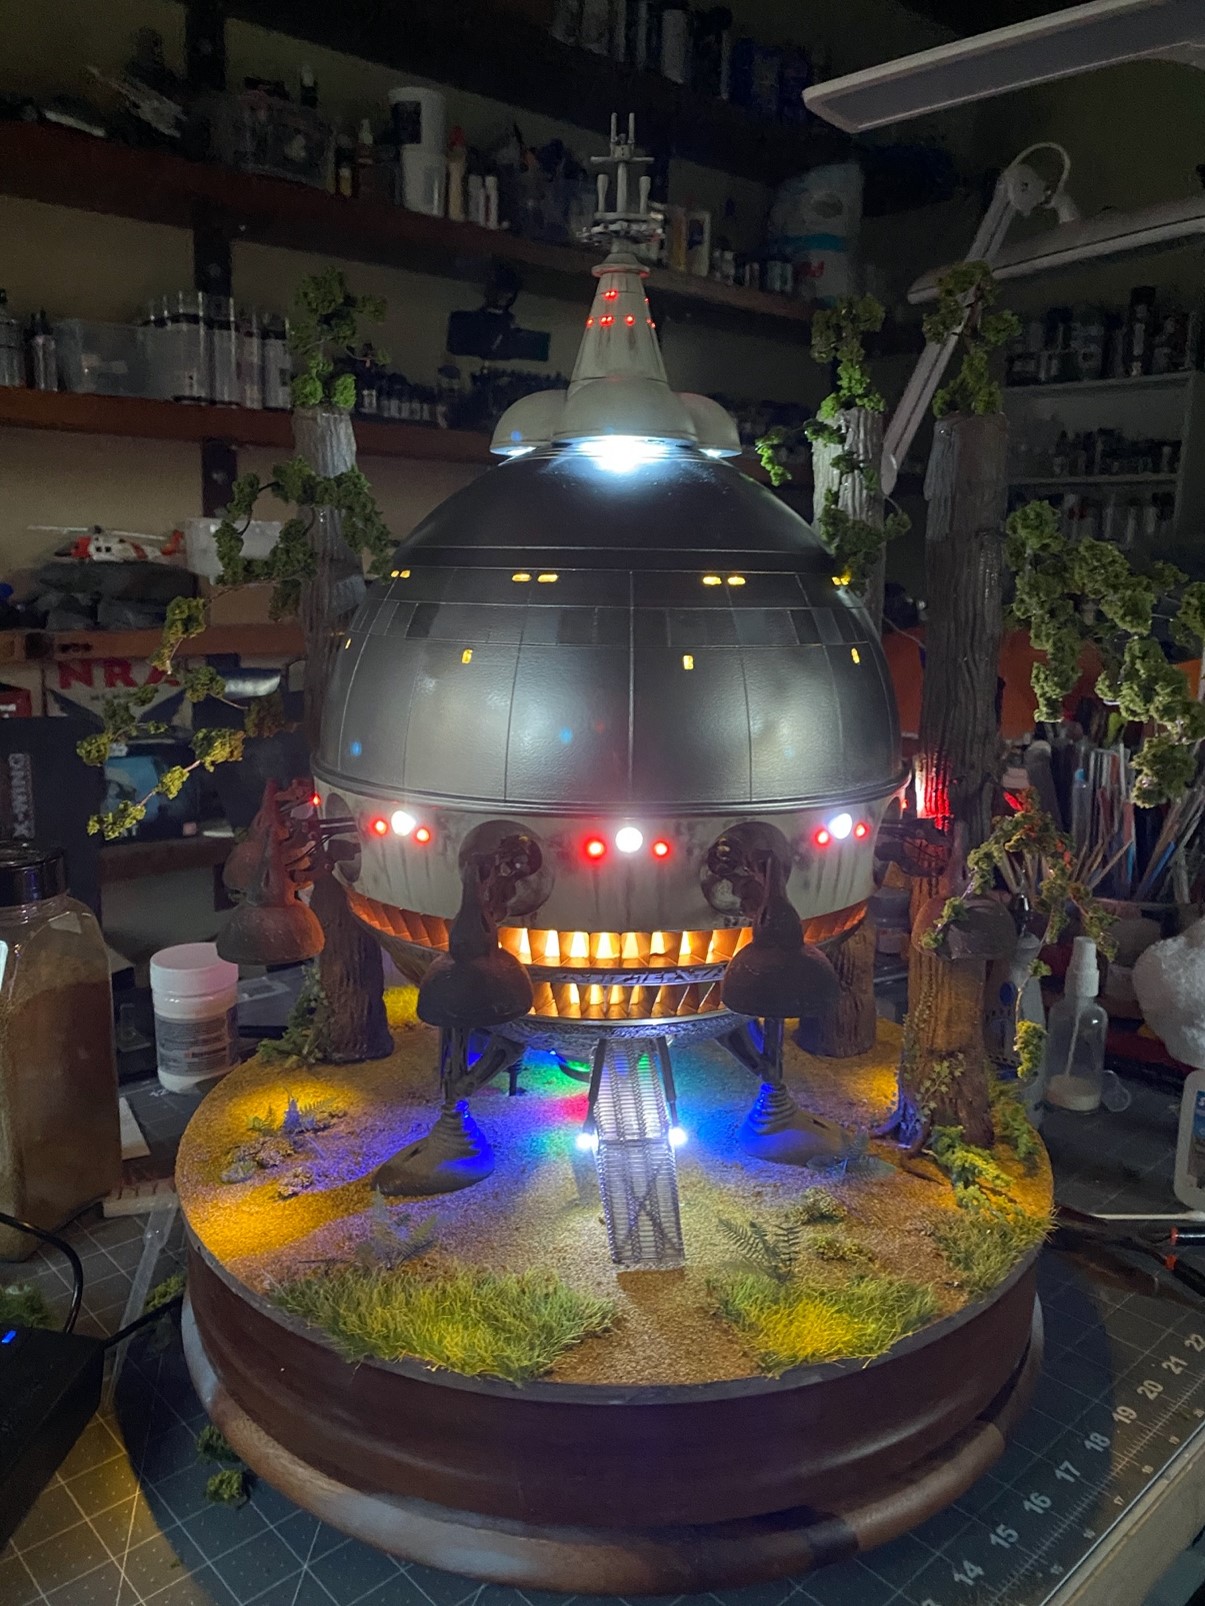
Everything was pretty much done at this point so I turned my attention to the diorama. I used a 19” base constructed from a turned piece of pine which I found at my local craft center pre-stained – I think it’s supposed to be for some showcase for small objects but who knows – the great thing about this hobby is using every day items and turning them into something amazing – great fun!
The base was prepared by covering it with a 19” round piece of cast resin I had from another project. I glued that to the wooden base then poured a thin layer of Bondo over that creating a rough texture with a sponge brush to mimic the ground. Once dry, I painted the surface with several coats of a medium brown acrylic paint. Once that had a chance to dry, I covered the base in various items from Woodland Scenic, a great source for train enthusiasts and those in need of stuff for their dioramas! The base also has ferns from MIG and small rocks courtesy of my back yard. The three Sequoia trees were made from ½” PVC pipe covered in “Epoxy Sculpt “– the branches were formed from soft copper wire, painted various shades of brown and tufted with Woodland Scenic, tree materials. The entire process is shown on my YouTube channel under E.T. Build.
Below are some of the MIG products I used and a shot of the finished terrain.

All in all, this was a challenging but fun experience I would highly recommend to the average modeler. Take your time, follow some of my tips and enjoy!
…………………………………………………………
RESOURCES:
The Kit – yaymonsters.com
Lighting – voodoofx.com
Additional lighting supplies – evansdesign.com
Base detail – MIG ferns and fauna, Woodland Scenics for bushes, trees and dirt.

